Programming with Go in Vim
Update 2016-02-16: anyone reading this post should stop reading and instead use vim-go</br>
Having decided to give Go a proper, well, go, it was time to get setup in Vim. The good news is the support is really rather, well, good. This article aims to cover the main steps required to kick start your development.
Firstly some assumptions on setup: my system is Ubuntu Linux running
bash. Although all of the steps can be adapted for other platforms/shells, I
will not include details in this article.
Step 1. Ensure you have a recent Vim version
Must be a recent version of Vim (more a demand of the plugins we will use later)
$ vim --version
VIM - Vi IMproved 7.4 (2013 Aug 10, compiled Feb 25 2014 10:54:46)
Included patches: 1-192
...
The full output of the features enabled in my custom build of Vim can be found here
Step 2. Ensure you have a working Go installation
I strayed from the offical docs at this point and went down the route of gvm:
$ bash < <(curl -s https://raw.github.com/moovweb/gvm/master/binscripts/gvm-installer)
$ exec bash
$ gvm install go1.2.1
$ mkdir $HOME/gostuff # my Go workspace
Add the following to the very bottom of your .bashrc:
# .bashrc

...

gvm use go1.2.1 > /dev/null 2>&1
export PATH="${GOPATH//://bin:}/bin:$PATH"
Now run gvm pkgenv and edit the setting of GOPATH to include your workspace (as required):
...
export GOPATH; GOPATH="$HOME/gostuff:$GVM_ROOT/pkgsets/go1.2.1/global"
...
Now restart your terminal or simply exec bash. The following commands should now work:
$ echo $GOROOT
/home/myitcv/.gvm/gos/go1.2.1
$ echo $GOPATH
/home/myitcv/gostuff:/home/myitcv/.gvm/pkgsets/go1.2.1/global
$ go version
go version go1.2.1 linux/amd64
Step 3. Ensure you know how to add Vim plugins
I would strongly recommend using pathogen.vim to manage plugins. pathogen.vim “makes it super easy to install
plugins and runtime files in their own private directories.” Additionally I manage my setup via
git submodules. All of the plugins we install later have instructions on how to
install via pathogen.vim.
Step 4. Install Go tools
These tools will help with omnicomplete (code completion), syntax checking, ‘go to definition’ support and ctags for Go:
$ go get -u github.com/nsf/gocode
$ go get -u code.google.com/p/rog-go/exp/cmd/godef
$ go get -u github.com/jstemmer/gotags
These three commands will fetch, build and install three tools:
$ which godef
/home/myitcv/gostuff/bin/godef
$ which gocode
/home/myitcv/gostuff/bin/gocode
$ which gotags
/home/myitcv/gostuff/bin/gotags
$ which gofmt
/home/myitcv/.gvm/gos/go1.2.1/bin/gofmt
gofmt is, as you can see, distributed as part of the main Go package.
Step 5. Install missing Vim packages
It is quite possible you already have some/all of these packages already installed. Therefore adapt the following list to suit your requirements:
Note: you will also need to follow the instructions for gotags’ tagbar
support
Once installed, generate help tags by opening Vim and running the command :Helptags (note capitalisation).
Step 6. Optionally configure these plugins
I will not explicity list my configuration options but instead refer the interested reader to my
.vimrc
Try it out!
If all has gone to plan, the following run through should work. First create a basic test:
$ mkdir -p ~/gostuff/src/github.com/myitcv/vimtest && cd $_
For this test we will use an external libray to demonstrate jumping to a definition. Let’s install that library now:
$ go get github.com/lib/pq
Create a simple file on which we can try out Vim’s new Go capabilities:
// main.go

package main

import (
  "fmt"
)

func main() {
  fmt.Println("This is a test")
}
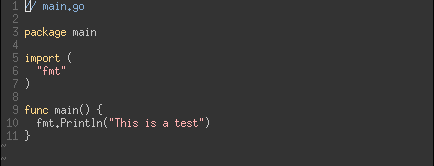
Syntax highlighting
The first thing you should notice editing the file is syntax highlighting. Indeed running the command :set ft you
should see the result filetype=go
Omnicompletion
Now let’s try omnicompletion. Start adding a new line as follows (the underscore represents the cursor position):
// main.go

package main

import (
  "fmt"
)

func main() {
  fmt.Println("This is a test")
  fmt.print_
}
In insert-mode type <Ctrl-x><Ctrl-o> which is translated as: hold down Ctrl then hit x and then o. You should be presented
with a ‘menu’ of options:
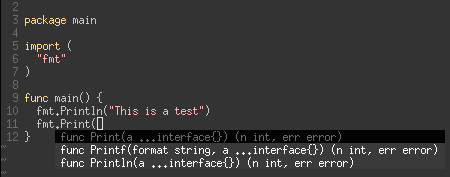
See :help i_CTRL-X_CTRL-O for more details.
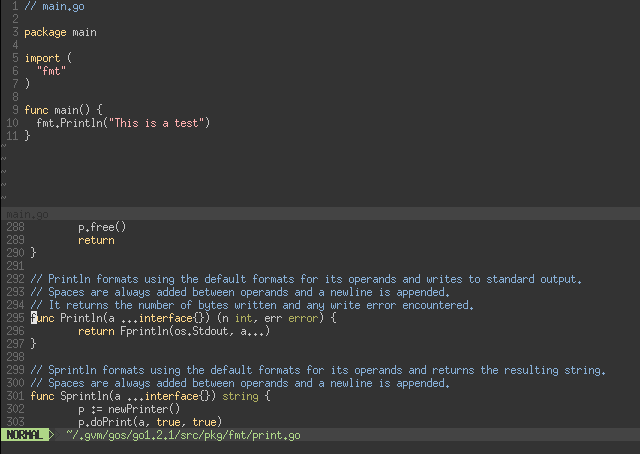
‘Go to definition’
Ensure your example code matches the following, with the cursor as shown after the t of Println:
// main.go

package main

import (
  "fmt"
)

func main() {
  fmt.Print_ln("This is a test")
}
In command-mode, type gd. This should cause a new split to open:
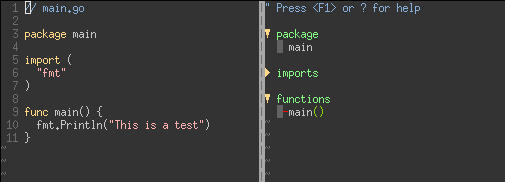
Tagbar
Close the split so that you are left with just main.go open. In command-mode type :TagbarOpen<CR> (the <CR> indicates
to hit ‘return’). You should see tagbar outline appear on the right hand side:
Syntax checking
Now let’s deliberately introduce an error into our source file:
// main.go

package main

import (
  "fmt"
)

func main() {
  fmt.Println("This is a test")
  a = b
}
Save main.go and observe the vim-airline status bar updates to show a syntax error:
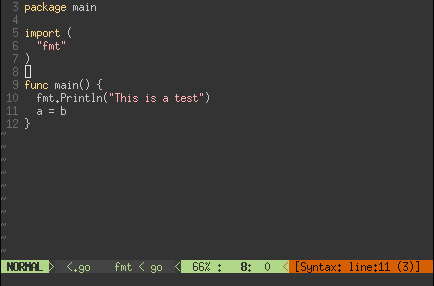
Furthermore, in command-mode if you type :Errors<CR> a quick fix window will open listing the errors.
Conclusion
And that’s the basics done!
Support for Go in Vim is made pretty good with the addition of a few simple plugins and Go tools. There are a huge
number of options that can be tweaked to customise the various plugins we have installed (again, checkout my
.vimrc for some ideas) and keyboard shortcuts setup to cut down on
typing. But even this basic start point will have you up and running and go-ing nuts.